To set up your Diono car seat, first make sure that the vehicle’s seat is in the upright position and that the front headrest is in place. Next, open the car seat’s cover and extend the shoulder straps to their full length. Then, thread the vehicle’s seatbelt through the car seat’s belt path and buckle it.
After that, pull on the shoulder strap to tighten it, and then use the LATCH system to secure the car seat in place. Finally, adjust the recline angle of the car seat so that your child is comfortable.
How to Install Diono Car Seat Rear-Facing?
Installing a Diono car seat can seem daunting, but with the right steps, you can do it easily and safely. Here’s how to install a Diono car seat:
- Read the manual: Before you start, read the manual carefully. It will give you detailed instructions on how to install your specific model of Diono car seat.
- Choose the right location: Choose a suitable location in your car for the car seat. Make sure you check the car manual for the recommended location for car seat installation.
- Adjust the seat angle: Adjust the seat angle to the appropriate level. For rear-facing seats, the angle should be more reclined than forward-facing seats.
- Install the seat belt or LATCH system: For forward-facing car seats, use the seat belt to secure the car seat. For rear-facing car seats, use the LATCH system or the seat belt to install the car seat. Make sure the seat belt or LATCH system is tight and secure.
- Check the recline angle: Check the recline angle of the car seat to ensure it’s correct for your child’s age and weight. Follow the instructions in the manual to adjust the recline angle.
- Adjust the harness: Adjust the harness to fit your child properly. The harness should be snug, with no slack or twists.
- Double-check the installation: Once you’ve installed the car seat, double-check it to make sure it’s secure. Try to wiggle it back and forth and side to side to ensure it doesn’t move more than one inch.
By following these steps, you can install a Diono car seat safely and correctly.

How to Put Together Diono Car Seat After Washing?
If you have a Diono car seat, you know how important it is to keep it clean. But what do you do if you need to wash it? Here are some tips on how to put your Diono car seat back together after washing it:
1. Make sure all the parts of your car seat are dry before you start. This includes the fabric, the straps, and the metal parts.
2. Start by reattaching the cover to the base. Make sure the cover is completely dry before doing this or it could mildew.
3. Next, reinstall the harnesses and adjust them to fit your child correctly.
4. Finally, reattach any accessories that came with your car seat such as cupholders or headrests. Now your Diono car seat is clean and ready to use!
How to Remove Diono Rear-Facing Base?
If you have a Diono car seat, you may be wondering how to remove the rear-facing base. This can be done by following these simple steps:
1. Unthread the harness straps from the slots on the back of the seat.
2. Unclip the chest clip and shoulder straps from the front of the seat.
3. Lift up on the tab located at the front of the base, and pull it forward to release it from its locked position.
4. Tilt the base forward and lift it out of the vehicle seat.
How to Remove Diono Car Seat?
If you have a Diono car seat that needs to be removed, there are a few things you need to do. First, you need to remove the harness straps from the car seat.
Next, you need to remove the headrest and armrests from the car seat.
Finally, you need to unscrew the base of the car seat from the vehicle’s seat. Once you’ve done all of this, your Diono car seat should be completely removed from your vehicle!
Diono Car Seat Instructions
Diono car seats are some of the most popular on the market, and for good reason. They’re durable, comfortable, and easy to install – but only if you know how. That’s why we’ve put together this comprehensive guide to Diono car seat instructions.
Whether you have a convertible, all-in-one, or booster seat, these step-by-step instructions will help you get it installed correctly in no time. And if you ever have any questions along the way, our team of certified child passenger safety technicians is always here to help. Convertible Car Seats:
For convertible car seats, start by reading the instruction manual that came with your seat. This will give you all the specific details about your particular model. Once you have a general understanding of how the seat works and what all the parts do, it’s time to get started installing it.
1) Start by placing the seat in the backseat of your vehicle. If your vehicle has adjustable headrests, make sure they are in the upright position before proceeding.
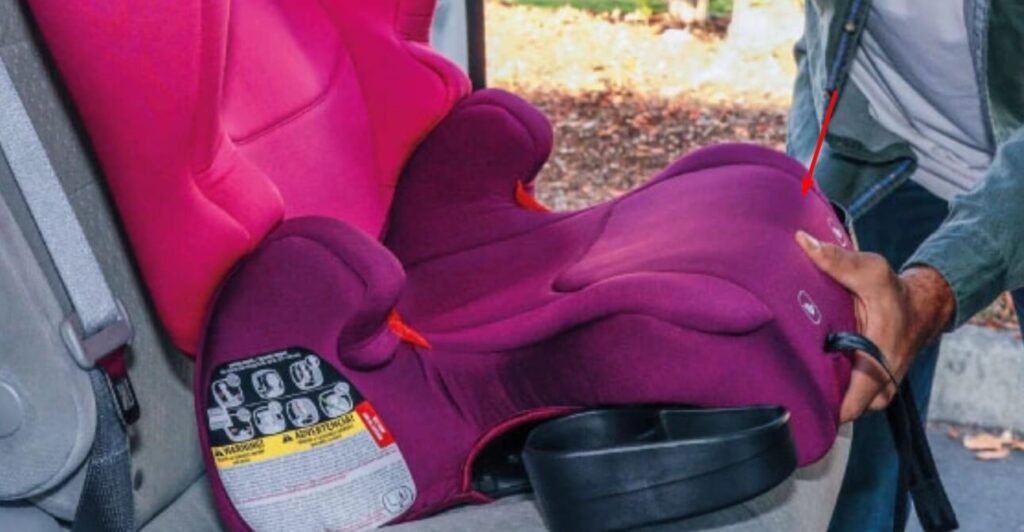
2) Next, thread the lap portion of your seat belt through the forward-facing belt path on your car seat (shown above).
The lap portion of the belt should be positioned underneath the metal bar located at the front of the car seat base.
3. After threading the lap portion of the seat belt through, pull up on the shoulder portion of the seat belt until it’s in direct contact with the car seat base. You may need to use your other hand to keep the seat tight against the vehicle seat.
Next, use the free end of the lap portion of the belt to pull tight on the shoulder portion. Do your best to make it as snug as possible (refer to the shoulder tightening instructions below if needed).
Make sure you don’t allow any excess webbing to hang down from the seat. This could interfere with the deployment of your vehicle’s airbags in case of a collision. And create a hazard for you and/or your passengers in the event of an emergency stop or sudden change in following distance ahead of you.
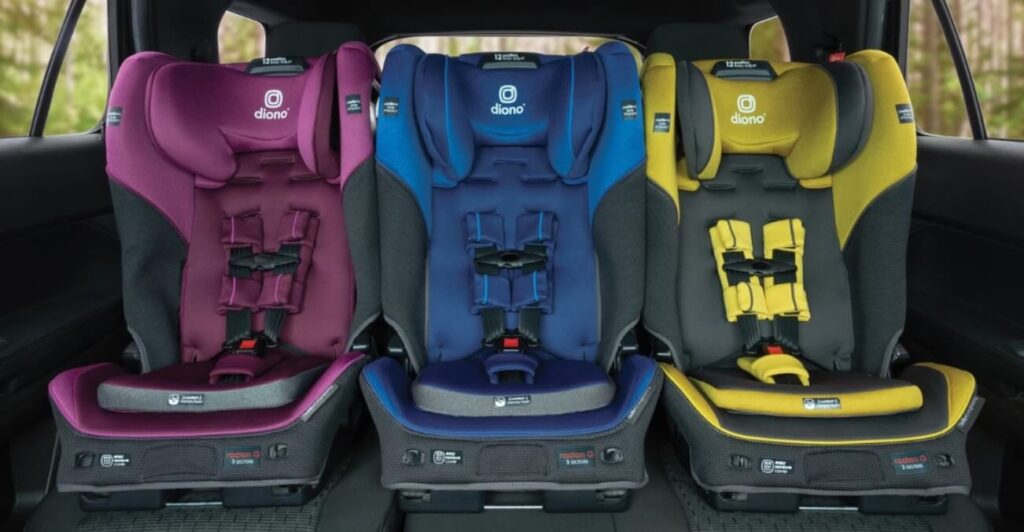
Diono Radian 3RXT
Diono Radian 3RXT All-in-One Convertible Car Seat, Extended Rear Facing 5-45 lbs & Forward Facing 20-65 lbs with Belt Path, Gray: The Diono Radian 3RXT is an all-in-one convertible car seat that can be used rear facing for children weighing 5 to 45 pounds and forward facing for children weighing 20 to 65 pounds. The seat has a steel frame and reinforced side walls for added safety and protection in a crash.
The seat also features an adjustable headrest and padded shoulder straps for comfort. The Diono Radian 3RXT is easy to install and use, making it a great choice for families with multiple vehicles or who travel often.
How to Install Diono Radian 3RXT: A Complete Guide
Getting Started
To begin, gather the necessary tools and materials for the installation:
- Diono Radian 3RXT car seat
- Vehicle owner’s manual
- Diono Radian 3RXT user manual
- Seatbelt or LATCH system
- Towel or pool noodle (for leveling if needed)
Positioning Your Car Seat
Proper positioning of the car seat is crucial for safety. Follow these steps:
- Center-Back Seat Placement: Whenever possible, install the Diono Radian 3RXT in the center of the back seat for optimal safety.
- Angle Adjustment: Ensure that the car seat is at the correct angle. Refer to the user manual for specific instructions on adjusting the recline angle to match your child’s age and size.
Securing with Seatbelt
Using Seatbelt for Installation
- Thread the Seatbelt: Pull the vehicle’s seatbelt through the rear-facing belt path of the car seat.
- Buckle and Tighten: Buckle the seatbelt and pull it tight to remove any slack.
- Check for Secure Fit: Press down firmly on the car seat to ensure it doesn’t move more than an inch in any direction.
Using LATCH System
Installing with LATCH
- Locate LATCH Anchors: Identify the LATCH anchors in your vehicle’s back seat.
- Attach LATCH Hooks: Connect the LATCH hooks to the designated anchors in your vehicle.
- Tighten Straps: Pull the LATCH straps tight to secure the car seat in place.
How to Install Diono Radian 3RXT?
Now that you have positioned your car seat and chosen your installation method, let’s dive into the specific steps for installing the Diono Radian 3RXT.
Step 1: Preparing the Car Seat
- Ensure the car seat is in the correct mode (rear-facing or forward-facing) based on your child’s age and weight.
Step 2: Positioning the Car Seat
- Follow the guidelines in the user manual to properly position the car seat.
Step 3: Seatbelt Installation
- Thread the seatbelt through the appropriate belt path.
- Buckle and tighten the seatbelt.
- Confirm a secure fit.
Step 4: LATCH Installation
- Locate and attach the LATCH hooks to the anchors.
- Tighten the LATCH straps securely.
Step 5: Final Checks
- Double-check that the car seat is snug and secure.
- Ensure the recline angle is correct for your child’s age and weight.
Can I use the Diono Radian 3RXT for newborns?
Yes, the Diono Radian 3RXT is suitable for newborns. Follow the rear-facing guidelines in the user manual for proper installation.
Do I need to use a pool noodle or towel for leveling?
Leveling may be necessary depending on your vehicle’s seat angle. Refer to the user manual for guidance on when to use a pool noodle or towel.
Can I install the car seat in the front passenger seat?
It is not recommended to install a car seat in the front passenger seat, especially if your vehicle has airbags. The safest placement is typically the center of the back seat.
How often should I check the car seat’s installation?
It’s essential to check the car seat’s installation regularly, especially after significant adjustments or if you remove and reinstall it. Ensure it remains securely in place.
Can I use the Diono Radian 3RXT for older children?
Yes, the Diono Radian 3RXT is designed to accommodate older children. Adjust the seat to the forward-facing mode as your child grows.
Are there any weight or height limits for the Diono Radian 3RXT?
Yes, there are weight and height limits for both rear-facing and forward-facing modes. Refer to the user manual for specific details based on your child’s age and size.
Diono Car Seat Moves
Diono car seats are designed to provide a comfortable, safe ride for your child. But what if you need to move the seat to another vehicle? Here’s how to do it:
1. remove the seat from the vehicle and place it on a flat surface.
2. loosen the straps that hold the seat in place. 3. remove the cover from the seat.
4. unscrew the bolts that attach the seat to the base.
5. remove the padding from the seat and set it aside. 6. fold down the sides of the seat so that it lies flat.
How Do You Install a Diono Car Seat Forward-Facing?
Installing a Diono car seat forward-facing is easy and only takes a few steps. First, you’ll need to remove the headrest and detach the shoulder belt from the car’s seatback. Next, thread the shoulder belt through the back of the car seat and buckle it.
Then, attach the tether strap to the anchor point in your vehicle and tighten it. Finally, install the headrest and adjust it to the proper height for your child.
How Do You Install a Diono Car Seat Rear Facing Seat Belt?
Most Diono car seats can be installed in a vehicle using either the seat belt or LATCH (Lower Anchors and Tethers for Children) system. To install the seat rear-facing using the seat belt, first thread the seat belt through the designated path on the back of the car seat, then click it into place.
Next, pull on the shoulder strap to tighten, then use the lap portion of the seat belt to secure around your child.
For additional safety, you can also use an aftermarket product like a locking clip that will help keep the seatbelt from loosening over time.
How to install diono rear facing?
Installing a Diono car seat in the rear-facing position is crucial for your child’s safety during car rides. Here’s a step-by-step guide on how to install a Diono car seat in the rear-facing position:
1. Choose the Right Location:
- Before you begin, select the appropriate spot in your vehicle’s back seat for the rear-facing car seat. The center of the back seat is the safest location, but if it doesn’t fit properly or your car doesn’t have LATCH anchors in the center, choose the back seat’s outboard positions.
2. Adjust the Recline Angle:
- Check the car seat’s user manual for specific instructions on the correct recline angle for your child’s age and weight. Most Diono car seats have an adjustable recline angle. Make sure it’s set correctly.
3. Attach Using LATCH (Lower Anchors and Tethers for Children):
- Locate the LATCH anchors in your vehicle. They are typically found in the crease of the vehicle’s back seat.
- Attach the car seat’s LATCH connectors to the LATCH anchors. There are usually two connectors: one for each side.
- Ensure that the LATCH straps are snug and not twisted.
- Press down on the car seat to compress it into the vehicle seat while tightening the LATCH straps.
4. Check for a Secure Fit:
- After attaching the LATCH connectors, check for a secure fit by trying to move the car seat side to side and front to back. It should not move more than an inch in any direction.
5. Using the Seatbelt for Installation (Optional):
- If your vehicle doesn’t have LATCH anchors or if you prefer using the seatbelt for installation, you can do so.
- Thread the vehicle’s seatbelt through the rear-facing belt path of the car seat.
- Buckle the seatbelt and pull it tight.
- Press down on the car seat to ensure it’s secure.
6. Recheck the Installation:
- Double-check that the car seat is securely installed, whether you used the LATCH system or the seatbelt method.
- Make sure the car seat is level, and there are no twists in the straps.
7. Position Your Child:
- Place your child in the car seat, ensuring they are properly secured with the harness straps. The straps should be snug against their shoulders and chest.
- Adjust the harness straps’ height to fit your child correctly.
8. Final Verifications:
- Recheck the recline angle to make sure it’s suitable for your child’s age and weight.
- Verify that the car seat doesn’t move more than an inch in any direction.
Where is the Diono Instruction Manual Located?
If you’re looking for the Diono instruction manual, it’s likely because you need some help using one of their products. Whether you have a question about installation or use, the answer can be found in the Diono instruction manual. The first place to look for your specific Diono product is on the website under “Support.”
Here, you’ll find manuals for all of their current products. If you don’t see your model listed, try checking “Product Archive” for older models. If you still can’t find what you’re looking for, reach out to customer service.
The team at Diono is happy to help ensure that you’re getting the most out of your purchase.
How Do You Install a Diono Car Seat in the Middle Seat?
If you have a Diono car seat, congratulations! You’ve made a great choice. Your child will be safe and comfortable in one of these seats.
But how do you install it in the middle seat? Here are the steps:
1. Read the instructions that come with your car seat. This is always the best place to start when installing any car seat.
2. Adjust the harness straps to fit your child snugly. The straps should be at or just below your child’s shoulders for rear-facing seats, and at or just above their shoulders for forward-facing seats.
3. Find the tether anchors in your vehicle and attach the tether strap to them according to the instructions. The tether strap keeps the car seat from moving too much in a crash or sudden stop.
4. Use either the LATCH system or your vehicle’s safety belt to secure the car seat base to your vehicle’s seat. If you’re using LATCH, make sure that all of the connectors are properly attached and locked before continuing. If you’re using a safety belt, thread it through the appropriate slots in the car seat base and buckle it tight enough that you can’t pull more than an inch of slack out of it.
Both methods should be used with care so that you don’t overtighten them and damage your vehicle’s seats or belts.
For both installation methods, once everything is tightened down, give each part of the connection a good tug to make sure everything is secure before putting your child in their new car seat!
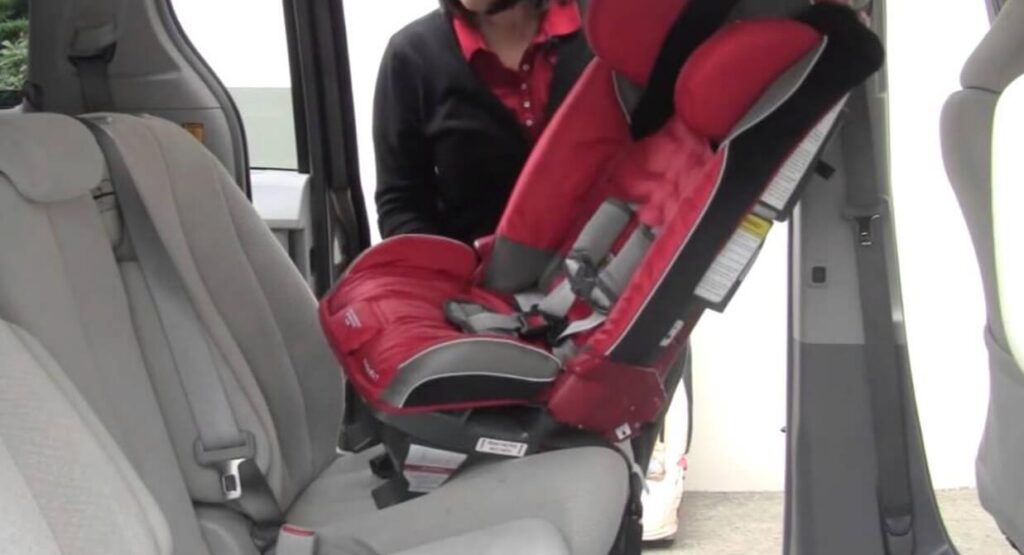
Diono 2020 Radian 3RXT Forward-Facing Installation
Conclusion
If you’re looking for a car seat that will last through multiple children, the Diono car seat is a great option. It’s easy to set up and can be used in both rear-facing and forward-facing positions. Here’s a step-by-step guide to setting up your Diono car seat:
1. Start by attaching the base of the car seat to your vehicle’s backseat using the LATCH system or a seatbelt.
2. Then, put your child in the car seat and thread the harness through the slots on either side of the seat.
3. Finally, adjust the harness so that it fits snugly around your child and buckle them in.